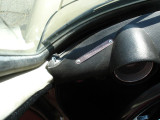
New, dash pad fitting all Type 3 models from 1961 to 1973.
One of the only reproductions available at the moment.
Made in the USA.
Fits:
- 1961-1973 Type 3 all models
- It is visually correct for 1971 to 1973 but will work for earlier models as well with some installation modifications.
HOW TO fit this pad to the earlier dash:
- Do this on a warm day in the sun.
- Step 1. Start on the left side by installing the speedometer and then the other 2 gauges, plastic rings are no longer needed but keep the spring ring in the gauge, apply some spray silicone to aid installation. At this point it's not necessary to install them all the way until the side securing clips expand from the back, you can do that after step 3.
- Step 2. Gently massage the pad to the right until you can fit the grab handle and secure it.
- Step 3. Drill pilot a hole on the both corner securing tabs, left and right and use self tapping large head screws, as shown in the ad. picture. Snug only, if you tighten it, the pad will split.
- Step 4. With the windshield out of the car, drill pilot holes, about 5 evenly spaced, along the leading edge and install screws as you did on step 3.
- Step 5. Push gauges all the way in or until they are flush and make proper ground, which should only happen when the clips expand behind the dash.
Note: The dash pad is made for 1971-1973 but it is possible to fit it to other years. Aside from the visual difference, there's a major difference in how it attaches to the car.
*On all of the original pads from 1861 to 1970, there were securing tabs along the edge of the pad closest to the windshield but in 1971, the factory added a metal pocket to that area, removed the tabs from the pad and the entire leading edge fits into the pocket and it is secured without the need of screws.


